How to Fix QuickBooks Error 1911?
Is QuickBooks Error Code 1911 creating hurdles in your QuickBooks operations? If yes, then this article shall provide solutions to all your problems related to this issue.
QuickBooks Error 1911 is usually linked to the registry
drive to which you are installing the software. It is encountered when you try
to install the QuickBooks pro on your system. This article provides you with
step-by-step methods for troubleshooting the error in simple ways. Read and
implement the walkways provided in this article to get all the information related
to the QuickBooks
error code 1911.
How to Resolve the QuickBooks' Error Code 1911'?
There are several different ways of fixing the Error Code
1911 in QuickBooks. It would be best if you implemented each of these
resolutions sequentially to ensure that the problem gets sorted out at the
earliest.
Method 1: Install the Adobe Flash Player
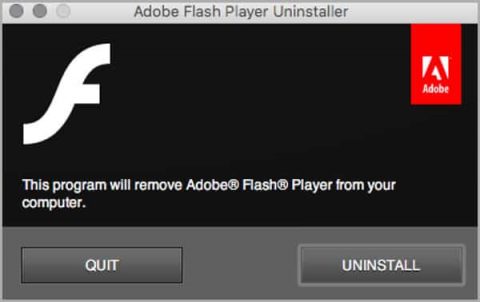
You are required to uninstall and reinstall Adobe Flash
Player. This might fix the error. Follow the steps below:
•
To open the 'Run'
window, press and hold the 'Win + R'
keys together.
•
Enter 'Control
Panel' and press the 'Enter'
key.
•
Select 'OK.'
•
Next, choose 'Uninstall a program.'
•
Select 'Adobe
Flash Player ' from the drop-down menu.
•
Next, select 'uninstall.'
•
To complete the procedure, you must follow the
directions on the screen.
•
Once you are done with uninstalling, go for a
fresh installation of Adobe Flash Player.
•
Check if the QuickBooks Error Code 1911 got
uprooted.
Method 2: Built-in Administrator settings
To start with, you need to activate the built-in admin. The
below steps help you to activate the built-in admin smoothly.
(a)Steps to activate the built-in admin
•
To open the 'Run'
window, press the 'Win + R' keys.
•
Once the Run window appears on the screen, type 'CMD' and press the 'Enter' key.
•
Right-click ‘cmd'
and choose 'Run as administrator.'
•
Press 'Enter.'
•
Start your computer in 'Safe Mode.'
(b)How to adjust the built-in-admin account
Once the above steps are processed, you need to adjust the
build-in admin account using the below mentioned steps.
•
Hold down the 'Ctrl + Alt + Delete' buttons at the same time. Select the 'switch user' option from the list of
options.
•
Now, go to the 'Start' menu option or hit the 'Windows'
key.
•
To select the user icon, click the upper right
corner of the screen.
•
Finally, hit and hold the 'Ctrl + Alt+ Delete' keys.
•
Choose 'Default
admin account.’
(c)How to hide the built-in-admin account
Below are the steps mentioned to hide the built-in-admin
account.
•
Press the 'Win
+ R' keys to access the 'Run'
window.
•
Type 'CMD'
and click 'enter.'
•
Right-click 'cmd.exe.'
and select the 'Run as Admin'
option.
•
Type 'No'
in the 'net user administrator'
option and then save it.
(d)How to configure security settings of the installation directory
•
Go to 'C
Drive,' then 'Program Files.'
•
Look for the 'Common Files' folder in the 'Program
Files' folder.
•
When you've found it, right-click it and select 'Properties.'
•
Under the 'Security'
tab, select the 'modify' option.
•
From the 'Group'
menu, choose 'Users' or 'Users Names.'
•
Go to 'permissions
for the users' and check the boxes for 'update/
read & execute' and 'Lists
folder contents R/W.'
•
Select 'Apply'
and then 'OK.'
Method 3: Download & recheck the Pester Directory
Follow the steps below to recheck the Pester directory.
•
Open the command prompt 'CMD' and look for QuickBooks Installer in the installed directory.
•
Run 'PSExec-is
QuickBooks' to install the QuickBooks system.
•
Finally, the QuickBooks Install diagnostic tool
is usually found in the download folder with the filename 'name1.exe.'
Method 4: Alter the settings of the setup editor
Follow the directions given below to modify the settings of
your setup editor.
•
If you don't want to register the type file, you
must first select the 'tables to tab'
option in 'Editor.'
•
After that, click on the 'TypeLib' table.
•
Now, you must insert the row containing the file
that is causing the error message.
•
After that, you'll need to delete that row and
restart your system.
•
Now, check whether the problem persists.
Hopefully, the methods of resolution listed in this article
must have assisted you in resolving QuickBooks
error 1911. If you followed the steps mentioned in each method in the
correct order, you should have resolved QuickBooks error 1911 successfully. If
you run into any problems while following the instructions provided in this
walkthrough, contact our QuickBooks Support Team for unprecedented support.


Comments
Post a Comment