Fix QuickBooks Update Error 15106 in 6 Simple methods
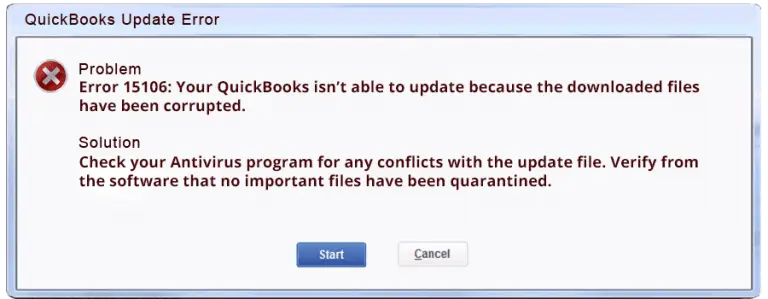
QuickBooks Error 15106 is a commonly encountered error that shows up while you attempt to update QuickBooks payroll. It is one of the most annoying errors faced in QuickBooks that prevents the seamless functioning of the software. To know more about the QuickBooks error code 15106, viz, the various causes, and reliable methods for fixing it, make sure that you go through this article until the very end.
Factors that lead to QuickBooks Update Error 15106
The update Error 15106 may erupt as a result of the
following factors:
•
You are not logged in as an administrator.
•
System security software has blacklisted QuickBooks
files and folders.
•
User Account Control prevents you from
downloading updates.
•
QuickBooks installation files are getting
corrupted.
You may also read : How to Mend QuickBooks Error 7300?
Effective Troubleshooting Methods to fix Update Error 15106
Listed below are the steps to quickly troubleshoot QuickBooks
payroll update error 15106:
Method 1: Log in to your PC as an Admin
•
Turn on your computer and log in as an Admin.
•
Navigate to the QuickBooks icon, right-click it,
and choose 'Run as Administrator.'

•
This grants you administrative access to the
QuickBooks program.
•
Now check if QuickBooks Update Error 15106 got fixed. If not, make a jump to the
following troubleshooting method.
Method 2: Update QuickBooks Desktop
Updating QuickBooks Desktop is deemed essential as it
reinforces QuickBooks with the latest available features to eliminate any
technical snags and issues associated therewith. To update QuickBooks Desktop,
follow the procedure given below:
•
Close all the programs
•
Then open QuickBooks by right-clicking on it and
selecting 'Run as Administrator.'
•
Press the 'Ctrl'
key while opening QuickBooks.
•
Once you see the 'No company open' window, release the 'Ctrl' key.
•
Head to the 'Help'
menu.
•
Choose 'Update
QuickBooks Desktop.'
•
Move to the 'Options'
tab.
•
Select the checkbox 'Mark All.'
•
Go for the option 'Reset Updates.'
•
Now, select 'Get
Updates' to start downloading the updates.
•
Once the download is finished, Restart QuickBooks
and install the downloaded updates.
•
Now, open QuickBooks Desktop and perform your
operations as usual. Check if you encounter the Update Error 15106 this time
around. If yes, go to the following method.
Method 3: Rename the folder & turn off the antivirus.
•
To open Task Manager, press and hold the 'Ctrl + Shift + Esc' keys together.
•
Click on the 'Processes' tab.
•
From the list of processes that show up,
identify the process associated with your antivirus.
•
Click on it and then click on 'End Task.'
•
Once you have performed the preceding steps, you
need to rename the folders of the QuickBooks update.
•
Access the 'File
Explorer' by pressing the 'Win + E'
short-key.
•
Head to location
[Drive]:\Program
Files\Intuit\QuickBooks\Components
•
Search for download 'QuickBooks' file
•
Once located, right-click on it and hit 'Rename.'
•
Type '.OLD'
at the end of the file name and click on the file to reflect the changes.
•
This method entailed a brief walkthrough for
disabling your antivirus software (if any) and then renaming the folder that
houses your update files; after implementing this method, open QuickBooks again
and check if the Error got rectified.
Method 4: Turn the UAC 'Off' and 'On.'
Follow the guidelines provided below to disable the User
Account Control:
•
Open the 'Run'
window by pressing the 'Win + R'
keys together.
•
Type 'Control
Panel.'
•
Hit 'Enter.'
•
Once the Control Panel opens, go to 'User Accounts.'
•
Tick-mark 'Change
user account control.' And click on 'Yes'
on the pop-up that shows up on the screen.

•
Move the slider to choose the 'Never Notify' option. By choosing this
option, you are disabling UAC.
•
Subsequently, Move the slider to 'Always Notify' to turn it 'ON.'
•
Reboot your PC and open QuickBooks desktop
again.
•
Check if the Error got stemmed out. If the Error
is unwavering and continues to bother you, jump onto the following method.
Method 5: Uninstall Antivirus.
Uninstalling the antivirus from your system can help rectify
update error 15106 in QuickBooks. To uninstall the security software, follow
the instructions provided below:

•
In the Windows 'Start' menu, type 'Control'
in the 'Search' box.
•
Select 'Control
Panel' and press 'Enter' to open
the Control Panel.
•
Click on 'Programs'
and then click on 'Programs and
Features.'
•
From the list, select your antivirus program.
•
Select 'Uninstall/Change.'
•
Click on 'Uninstall'
and wait for the process to conclude.
•
Now, open QuickBooks Desktop again and check if
the error got resolved.
Method 6: Clean install QuickBooks Desktop in Selective Startup mode
•
Create the backup of your Company File
•
Have the license number or product number with
you before starting the process.
•
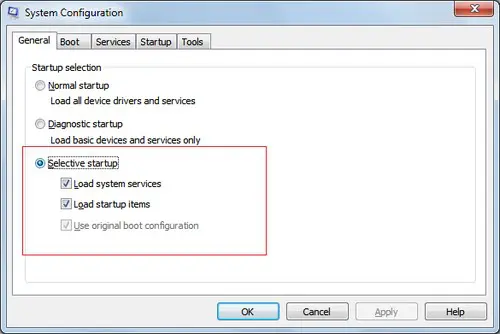
Start your computer in the 'Selective Startup mode.'
•
Open the 'Run'
window by pressing the 'Win + R'
keys together.

•
Type 'MSConfig'
and hit 'Enter.'
•
In the window that opens up, head to the 'General' tab.
•
Choose 'Selective
Startup and Load system services.'
•
Head to the 'Services'
tab and Tick-mark 'Hide all Microsoft
Services.'
•
Choose the 'Disable
All' option.

•
After that, clear off the tick-mark from 'Hide all Microsoft Services.'
•
Select 'OK'
to save all changes.
•
Reboot your PC.
•
Now, open the Control Panel and head to 'Programs and Features.'
•
Choose 'QuickBooks
Desktop' from the list.
•
Select 'Uninstall/Change.'
•
Opt for 'Uninstall
a program.'
•
Wait for your system to uninstall QuickBooks
Desktop. Subsequently, restart your PC.
•
Reinstall QuickBooks Desktop using your license
and product keys.
•
Once the installation process is over, launch QuickBooks
Desktop after switching to normal mode.
This should have uprooted the error!
You may also read : How to Resolve QuickBooks Error Code 179?
We hope that by adhering to the troubleshooting methods
mentioned in this article, you could successfully fix the QuickBooks Update Error 15106. If you still encounter this issue,
you may contact our QuickBooks Customer Support Team to get your queries sorted
out. We are available 24/7 to resolve your QuickBooks -related snags.


Comments
Post a Comment